Table of Contents
Editing Your Alt-text
Part of the writing process for Image Descriptions is to self edit your work. Part of your job expectations is to produce accessible versions of the titles you are assigned. Alt-text is an essential part of accessibility.
It can take longer to learn how to write image descriptions than the other parts of reformatting an ebook, and we are here to help and support you on this journey. Even after you have gotten a handle on how to describe images, there will always be times when you struggle and need assistance. This section will walk you through the editing process, and provide you with some useful tips. We have also created the Alt-text Q&A page to help with any tricker images and all your Alt-text related questions!
It is important to remember that when a reader listens to Alt-text it is extra work compared to someone visually absorbing the image. Shorter, more efficient Alt-text helps people get that content and avoid cognitive overload. Editing is essential to this process.
Basic Steps
The first step is to write the Alt-text, and try not to get too bogged down on getting it perfect the first time. The documentation on this wiki, along with the additional resources and Alt-text samples, will help you in your writing. Think of this as your first draft.
You should aim to edit your work at least three times before you submit a final draft of a title.
- After writing, copyedit for clarity
- Next day copyedit for structure and clarity (aim to be able to recreate the image in description)
- Final proofread to catch any grammar and punctuation mistakes
How to Edit Alt-text
DAISY released a series of webinars on Alt-text, and their video on editing is very informative. You can watch it is it entirety through the following link:https://daisy.org/news-events/articles/art-science-describing-images-w/
Below are the highlights from this video.
Edit to Provide Clarity
Make sure you use specific language and simple word choices in order to be clear. Write out any acronyms and symbols and use proper grammar and punctuation.
Edit to Organize Information
Work from the general to the specific and group like items together for ease of reading comprehension. Organize information within your image description in a clear predictable way. This will help the reader to get into the rhythm of the description. Start with similarities, and if needed describe differences.
Edit to Remain Neutral
Try not to instruct, or go beyond what is contained within the image. Describe what is in the image and avoid interpreting. This goes back to being clear, direct, and concise. You can describe actions or expressions, but don’t attempt to interpret thoughts and feelings unless the context requires this. Go to Be Objective and Skin tone, Gender and Age for more of how to describe people in images.
For example:
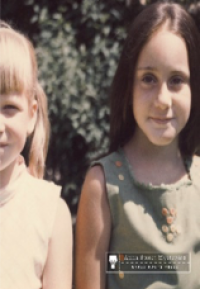
Alt-text: Two young girls stand beside each other and smile in the sunlight. There is a green leafy bush in the background. They both look directly into the camera. They both have a light skin tone. One girl has blonde hair in pigtails and wears a white dress, and the other has long loose brown hair and wears a green dress.
Edit to Reduce Redundancy
Edit descriptions that are too wordy and cut unnecessary phrases. Avoid repeating a caption, if one is present, and try not to regurgitate the surrounding text. Use pronouns when necessary to help tighten up the description. Avoid phrases like image of as this is redundant. Avoid words like shows or appears as it will be clear in the description that what you are writing is what is in the image.
Remember to consider the cognitive load of your reader. The average person can remember 7 items at a time, which means less is more when you are writing an image description. Using fewer words helps the listener to process information more efficiently. This is why being direct and concise is so important, and using Active Voice and Present Tense helps achieve this in your writing.
Other Tips for Editing
Below are some more helpful tips for editing your work.
Read Aloud
After you finish writing your first draft, read your work back to yourself out loud. Reading aloud can help you hear mistakes that you may not catch when reading in your head.
It is good to combine reading in your head with reading aloud, as it breaks up the way you are absorbing the information and heightens your chance of catching any mistakes.
Sleep on It
It is important to wait at least a day before you start any deeper edits on your image descriptions. This will ensure you have fresh eyes, and will avoid burnout. You will not be able to write or edit any good image descriptions if you are tired or burnout.
Know Your Limits
Learn what time of day you have the best focus for writing and editing image descriptions. This work is all about attention to detail and self editing, so you need to know when you are the most focused to be able to perform these tasks efficiently. Don’t write if you are tired, distracted or burnt out. You will not be able to focus and you will not be able to pay proper attention to details, which means you will make more mistakes.

